ใครที่สนใจ IOT ( ทุกอย่างเป็นInternet)ไม่รู้ว่าจะเริ่มอย่างไร มองไปทางใหนก็ยากไปหมด ลองใช้ APP Inventor ดูครับ น่าสนใจดี ง่าย ๆ ตามตัวอย่างนี้ ควบคุมการปิดเปิด อุปกรณ์ไฟฟ้า และ หลอดไฟ แบบพื้นฐาน การประยุกติ์ ขึ้นอยู่กับผู้ใช้ครับ

สิ่งที่ต้องจัดเตรียมดังนี้ครับ
1. โปรแกรม Arduino IDE หา Download ได้ จาก Arduino.cc ใช้สำหรับโปรแกรม Node MCU
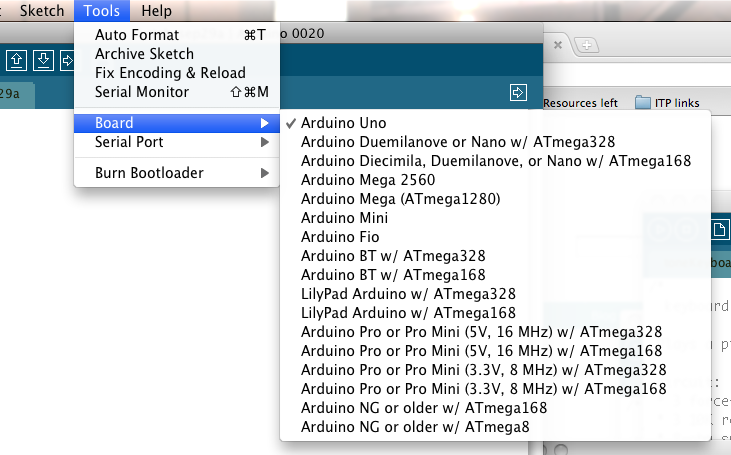


2.Board Node MCU ESP8266 แนะนำใหม่สุด V3. หาได้ตาม ร้าน Arduino ทั่วไป

หมายเหตุ ยังมี Board ที่ใช้ CPU ESP8266 อีกหลาย ยี่ห้อ แต่แนะนำตัวนี้ เนื่องจากสะดวกที่สุด มี USB TO Serial ในตัว และ Auto program ซึ่งใช้งานสะดวกสำหรับผู้เริ่มต้นครับ
3.Google Account สำหรับ ใช้ App Inventor ใช้งาน ได้ตาม Link นี้ครับ http://ai2.appinventor.mit.edu
ปล.เครื่อง คอมพิวเตอร์ต้องติดตั้ง Java ด้วยครับ
การเขียนโปรแกรม แบ่งเป็น 2 ส่วน
1.โปรแกรมควบคุม ในที่นี้เขียนด้วย App Inventor เราจะเรียกว่าเป็น Client


ตัวอย่าง Download App Inventor กดที่ Icon ได้เลยครับ
2. โปรแกรมสำหรับ Node MCU เราใช้ Arduino IDE เขียน สำหรับการติดตั้ง Library สำหรับ Node MCU ให้ ศึกษา และ ติดตั้งตาม Link นี้ครับ http://github.com/esp8266/arduino
ส่วนนี้เราจะเรียกว่า Server
ส่วน Source Code ของ Node MCU copy ตามนี้ไปทดลองได้เลยครับ
/*
* This sketch demonstrates how to set up a simple HTTP-like server.
* The server will set a GPIO pin depending on the request
* http://192,168,1,8/gpio/0 will set the GPIO2 low,
* http://192,168,1,8/gpio/1 will set the GPIO2 high
* server_ip is the IP address of the ESP8266 module, will be
* printed to Serial when the module is connected.
* io follow gpio not d0 ---- supak 27 dec 2015
* Fix IP For test supak 27 dec 2015
*/
#include
const char* ssid = "................"; // ชื่อ Access Point
const char* password = "..............."; //password Access Point
IPAddress local_ip = {192,168,1,8}; // IP address ของ Node MCU แก้ตามเหมาะสมของผู้ใช้
IPAddress gateway = {192,168,1,1}; //
IPAddress subnet = {255,255,255,0};
WiFiServer server(80); // http port
// Create an instance of the server
// specify the port to listen on as an argument
void setup() {
Serial.begin(115200);
delay(10);
// prepare GPIO5 กำหนดขา ควบคุมค่า Output ของ Node MCU
pinMode(5, OUTPUT);
digitalWrite(5, 0);
// Connect to WiFi network
Serial.println();
Serial.println();
Serial.print("Connecting to ");
Serial.println(ssid);
WiFi.begin(ssid, password);
WiFi.config(local_ip, gateway, subnet);
while (WiFi.status() != WL_CONNECTED) {
delay(500);
Serial.print(".");
}
Serial.println("");
Serial.println("WiFi connected");
// Start the server
server.begin();
Serial.println("Server started");
// Print the IP address
Serial.println(WiFi.localIP());
}
void loop() {
// Check if a client has connected
WiFiClient client = server.available();
if (!client) {
return;
}
// Wait until the client sends some data
Serial.println("new client");
while(!client.available()){
delay(1);
}
// Read the first line of the request
String req = client.readStringUntil('\r');
Serial.println(req);
client.flush();
// Match the request
int val;
if (req.indexOf("/gpio/0") != -1)
val = 0;
else if (req.indexOf("/gpio/1") != -1)
val = 1;
else {
Serial.println("invalid request");
client.stop();
return;
}
// Set GPIO2 according to the request
digitalWrite(5, val);
client.flush();
// Prepare the response
String s = "HTTP/1.1 200 OK\r\nContent-Type: text/html\r\n\r\n\r\n\r\nGPIO is now ";
s += (val)?"high":"low";
s += "
\n";
// Send the response to the client
client.print(s);
delay(1);
Serial.println("Client disonnected");
// The client will actually be disconnected
// when the function returns and 'client' object is detroyed
}
Layout Pin Node MCU ตามนี้ครับ

มีคนเขียนเรื่อง Node MCU ESP8266 ใว้มากมาย หาอ่านได้ตามอัธยาศัยเลยครับ กดตาม Link นี้เลยครับ
ท่านใดสนใจอยากรู้อะไรเพิ่มเติมก็สามารถสอบถามจาก ความคิดเห็นข้างล่างนี้ได้ครับ

สิ่งที่ต้องจัดเตรียมดังนี้ครับ
1. โปรแกรม Arduino IDE หา Download ได้ จาก Arduino.cc ใช้สำหรับโปรแกรม Node MCU
เราจะต้องติดตั้ง Esp8266 Library โดยทำตามนี้ครับ
ที่ preferences menu จะต้องทำการเพิ่มเติม ตามรูปข้างล่างนี้ก่อนครับ
http://arduino.esp8266.com/stable/package_esp8266com_index.json

และที่ Board Manager ให้ทำการ UPDATE และ Install ESP8266 ฺBoard ตามนี้ครับ


หมายเหตุ ยังมี Board ที่ใช้ CPU ESP8266 อีกหลาย ยี่ห้อ แต่แนะนำตัวนี้ เนื่องจากสะดวกที่สุด มี USB TO Serial ในตัว และ Auto program ซึ่งใช้งานสะดวกสำหรับผู้เริ่มต้นครับ
3.Google Account สำหรับ ใช้ App Inventor ใช้งาน ได้ตาม Link นี้ครับ http://ai2.appinventor.mit.edu
การเขียนโปรแกรม แบ่งเป็น 2 ส่วน
1.โปรแกรมควบคุม ในที่นี้เขียนด้วย App Inventor เราจะเรียกว่าเป็น Client


ตัวอย่าง Download App Inventor กดที่ Icon ได้เลยครับ
2. โปรแกรมสำหรับ Node MCU เราใช้ Arduino IDE เขียน สำหรับการติดตั้ง Library สำหรับ Node MCU ให้ ศึกษา และ ติดตั้งตาม Link นี้ครับ http://github.com/esp8266/arduino
ส่วนนี้เราจะเรียกว่า Server
นนี้

ส่วน Source Code ของ Node MCU copy ตามนี้ไปทดลองได้เลยครับ
/*
* This sketch demonstrates how to set up a simple HTTP-like server.
* The server will set a GPIO pin depending on the request
* http://192,168,1,8/gpio/0 will set the GPIO2 low,
* http://192,168,1,8/gpio/1 will set the GPIO2 high
* server_ip is the IP address of the ESP8266 module, will be
* printed to Serial when the module is connected.
* io follow gpio not d0 ---- supak 27 dec 2015
* Fix IP For test supak 27 dec 2015
*/
#include
const char* ssid = "................"; // ชื่อ Access Point
const char* password = "..............."; //password Access Point
IPAddress local_ip = {192,168,1,8}; // IP address ของ Node MCU แก้ตามเหมาะสมของผู้ใช้
IPAddress gateway = {192,168,1,1}; //
IPAddress subnet = {255,255,255,0};
WiFiServer server(80); // http port
// Create an instance of the server
// specify the port to listen on as an argument
void setup() {
Serial.begin(115200);
delay(10);
// prepare GPIO5 กำหนดขา ควบคุมค่า Output ของ Node MCU
pinMode(5, OUTPUT);
digitalWrite(5, 0);
// Connect to WiFi network
Serial.println();
Serial.println();
Serial.print("Connecting to ");
Serial.println(ssid);
WiFi.begin(ssid, password);
WiFi.config(local_ip, gateway, subnet);
while (WiFi.status() != WL_CONNECTED) {
delay(500);
Serial.print(".");
}
Serial.println("");
Serial.println("WiFi connected");
// Start the server
server.begin();
Serial.println("Server started");
// Print the IP address
Serial.println(WiFi.localIP());
}
void loop() {
// Check if a client has connected
WiFiClient client = server.available();
if (!client) {
return;
}
// Wait until the client sends some data
Serial.println("new client");
while(!client.available()){
delay(1);
}
// Read the first line of the request
String req = client.readStringUntil('\r');
Serial.println(req);
client.flush();
// Match the request
int val;
if (req.indexOf("/gpio/0") != -1)
val = 0;
else if (req.indexOf("/gpio/1") != -1)
val = 1;
else {
Serial.println("invalid request");
client.stop();
return;
}
// Set GPIO2 according to the request
digitalWrite(5, val);
client.flush();
// Prepare the response
String s = "HTTP/1.1 200 OK\r\nContent-Type: text/html\r\n\r\n\r\n\r\nGPIO is now ";
s += (val)?"high":"low";
s += "
\n";
// Send the response to the client
client.print(s);
delay(1);
Serial.println("Client disonnected");
// The client will actually be disconnected
// when the function returns and 'client' object is detroyed
}

ท่านใดสนใจอยากรู้อะไรเพิ่มเติมก็สามารถสอบถามจาก ความคิดเห็นข้างล่างนี้ได้ครับ
เรียนท่านผู้เยี่ยมชม
ต้องขออภัย เกี่ยวกับบทความบางหัวข้อใน blog นี้ ที่ไม่มีความต่อเนื่องในบางบทความ. เนื่องจากเป็นการแชร์ประสบการณ์ การทำงาน ในงานพัฒนาด้าน Mini CNC . ที่เราคิดว่าอาจเป็นประโยชน์ต่อผู้ศึกษา หรือทำงานเกี่ยวกับด้านนี้.จึงนำมาเล่าสู่กันฟัง .
ส่วนงานหลักที่เราต้องรับผิดชอบคือการให้ความรู้เกี่ยวกับการใช้งาน Mini CNC ซึ่งเป็นสินค้าที่เราจำหน่าย และเราต้องรับผิดชอบดูแลลูกค้า.
ดังนั้นบทความหลัก จะเป็นเรื่องที่เกี่ยวกับ Mini CNC. อีกทั้งบทความเหล่านี้เขียนด้วยคนเพียงคนเดียว . ที่มีงานรับผิดชอบด้านอื่นด้วย . จึงมีเวลาไม่มากที่จะทำได้ทุกเรื่อง.
ขออธิบายให้เข้าใจนะครับ. หากท่านใดสนใจ ติดตาม หรือ มีคำถามสามารถสอบถามในส่วนแสดงความคิดเห็นมาได้ครับ ยินดีตอบ หากเราทราบ และมีความรู้ในด้านนั้น
ยกตัวอย่าง ตาม link นี้ครับ http://panmaneecnc.blogspot.com/2015/12/esp8266-wifi-app-inventor.html
และอยากขอเชิญชวนคนไทยให้มาสร้าง วัฒนธรรมการ การรับ และ การให้ ด้วยกันครับ เราอยากเห็นสังคมไทยมีความสามัคคี ไม่แบ่งแยก และ เห็น แก่ตัว หรือ เอาแต่พวกพ้องของตนเอง เพียงเท่านี้ประเทศไทยก็แข่งขันกับคนอื่นได้แล้วครับ
ขอขอบคุณในนาม panmaneecnc.com
ขึ้น error แบบนี้ เป็นเพราะอะไรครับ
ตอบลบArduino: 1.6.7 (Windows 7), Board: "NodeMCUV2 (ESP8266 ESP-12E Module), 80 MHz, Serial, 115200, 4M (3M SPIFFS)"
test_auto_pump_feed.ino:1: error: #include expects "FILENAME" or
#include
^
exit status 1
#include expects "FILENAME" or
This report would have more information with
"Show verbose output during compilation"
enabled in File > Preferences.
รบกวนขอดู Source Code ได้ใหมครับ
ลบผม copy จากเว็ปนี้เลยครับ แล้วปรับแก้ ssid pass และ ip เท่านั้นเอง ไม่ทราบว่ามีอะไรผิดปกติมั้ยครับ
ลบ/*
* This sketch demonstrates how to set up a simple HTTP-like server.
* The server will set a GPIO pin depending on the request
* http://192,168,1,8/gpio/0 will set the GPIO2 low,
* http://192,168,1,8/gpio/1 will set the GPIO2 high
* server_ip is the IP address of the ESP8266 module, will be
* printed to Serial when the module is connected.
* io follow gpio not d0 ---- supak 27 dec 2015
* Fix IP For test supak 27 dec 2015
*/
#include
const char* ssid = "................"; // ชื่อ Access Point
const char* password = "..............."; //password Access Point
IPAddress local_ip = {192,168,1,8}; // IP address ของ Node MCU แก้ตามเหมาะสมของผู้ใช้
IPAddress gateway = {192,168,1,1}; //
IPAddress subnet = {255,255,255,0};
WiFiServer server(80); // http port
// Create an instance of the server
// specify the port to listen on as an argument
void setup() {
Serial.begin(115200);
delay(10);
// prepare GPIO5 กำหนดขา ควบคุมค่า Output ของ Node MCU
pinMode(5, OUTPUT);
digitalWrite(5, 0);
// Connect to WiFi network
Serial.println();
Serial.println();
Serial.print("Connecting to ");
Serial.println(ssid);
WiFi.begin(ssid, password);
WiFi.config(local_ip, gateway, subnet);
while (WiFi.status() != WL_CONNECTED) {
delay(500);
Serial.print(".");
}
Serial.println("");
Serial.println("WiFi connected");
// Start the server
server.begin();
Serial.println("Server started");
// Print the IP address
Serial.println(WiFi.localIP());
}
void loop() {
// Check if a client has connected
WiFiClient client = server.available();
if (!client) {
return;
}
// Wait until the client sends some data
Serial.println("new client");
while(!client.available()){
delay(1);
}
// Read the first line of the request
String req = client.readStringUntil('\r');
Serial.println(req);
client.flush();
// Match the request
int val;
if (req.indexOf("/gpio/0") != -1)
val = 0;
else if (req.indexOf("/gpio/1") != -1)
val = 1;
else {
Serial.println("invalid request");
client.stop();
return;
}
// Set GPIO2 according to the request
digitalWrite(5, val);
client.flush();
// Prepare the response
String s = "HTTP/1.1 200 OK\r\nContent-Type: text/html\r\n\r\n\r\n\r\nGPIO is now ";
s += (val)?"high":"low";
s += "
\n";
// Send the response to the client
client.print(s);
delay(1);
Serial.println("Client disonnected");
// The client will actually be disconnected
// when the function returns and 'client' object is detroyed
}
หรือ ทดลอง Compile Code ง่าย ๆ ก่อนเพื่อทดสอบ ทีละขั้นตอนครับ เช่น โปรแกรม Blink Led ว่า Board มันทำงานปกติหรือไม่
ตอบลบทำงานปกติครับ
ลบต้องขอโทษด้วยครับ เกิดจากความผิดพลาดในการเขียนครับ
ตอบลบ#include
#include
ตอบลบผมแก้ให้ในบทความแล้วครับ
#include ใน blog ไม่ยอมให้ ใส่เครื่องหมาย < . ESP8266WiFi.h . > มันเลยหายไป
ตอบลบ#include ESP8266WiFi.h
ให้เอา จุด 2 จุด ออกด้วยนะครับ หน้าหลัง ใส่เพื่อให้เห็นใน Blog
ลบ// Match the request
ตอบลบint val;
if (req.indexOf("/gpio/0") != -1)
val = 0;
else if (req.indexOf("/gpio/1") != -1)
val = 1;
else {
Serial.println("invalid request");
client.stop();
return;
}
ช่วยอธิบายตรงนี้หน่อยได้ครับ ผมไม่เคยเล่น แต่สนใจมาก พอมีหนังสือหรือแหล่งข้อมูล เรื่องโค้ดแต่ละบรรรทัดไหมครับ ขอบคุณที่เสียสละเวลานะครับ
WiFiServer server(80); // http port
ลบมันคืออะไรครับ T_T ผมจะดู ของผมไดยังไงครับ
รูปแบบการสื่อสาร ที่เราใช้กัน มี 3 แบบ คือ หาอ่านได้จาก ตรงนี้ครับ https://en.wikipedia.org/wiki/Internet_protocol_suite
ลบ3 protocol ที่ใช้กันตามรายการข้างล่างครับ ซึ่งต้องมีการกำหนด port สำหรับการสื่อสารเอาใว้ครับ หากสนใจจะต้องเรียนรู้เรื่องพื้นฐานก่อนจะมีประโยชน์มากครับ หากวันหลังมีโอกาส จะเขียนให้ครับ
1.http protocol โดยมากกำหนดที่ port 80 ซึ่งต้องเรียกใช้งานผ่าน Browser
https://en.wikipedia.org/wiki/Hypertext_Transfer_Protocol
2.tcp protocol
https://en.wikipedia.org/wiki/Transmission_Control_Protocol
3.udp protocol
https://en.wikipedia.org/wiki/User_Datagram_Protocol
ทั้ง 3 protocal มีข้อดี และ ข้อเสีย ไม่เหมือนกันครับ และวิธีการใช้งานก็ไม่เหมือนกันครับ
หาอ่านเพิ่มเติมได้จากที่นี่ครับ
ตอบลบhttp://www.w3schools.com/website/web_tcpip.asp
ขอบคุณพี่แอ๊ดมินมากๆครับ ตอบเร็วทันใจมาก
ลบ// Match the request
ตอบลบint val; //ประกาศตัวแปร val
if (req.indexOf("/gpio/0") != -1) //ในกรณี req นี่คือขำขอปะครับ แบบว่าขำรอของ GPIO0 ไม่เท่ากับ -1
val = 0; // ให้ค่า val =0
else if (req.indexOf("/gpio/1") != -1) // ถ้า คำขอ GPIO1 ไม่เท่ากับ -1
val = 1; //ให้ค่า val=1
else { // ในกรณีถ้าไม่ใช่ทั้งหมด
Serial.println("invalid request"); //แสดงผล invalid request
client.stop(); // ให้ไคลเอนท์หยุด
return; //ย้อนกลับไปฟังชั่นบน
}
// Set GPIO2 according to the request
digitalWrite(5, val); //อันนี้ให้โหนดกำหนด GPIO ตามคำขอ (request)
client.flush(); // ฟังชั่น ที่รอตัวแปรเอาต์พุตถ้าหมดถูกส่งไป
// Prepare the response // ตรงนี้ ผมไม่เข้าใจเลยครับแอ๊ดมินยังไง
String s = "HTTP/1.1 200 OK\r\nContent-Type: text/html\r\n\r\n\r\n\r\nGPIO is now ";
s += (val)?"high":"low";
s += "
\n";
// Send the response to the client
client.print(s);
delay(1);
Serial.println("Client disonnected");
// The client will actually be disconnected
// when the function returns and 'client' object is detroyed
}
หากผิดตรงไหนช่วยติงหน่อยนะครับ พอดีผมอยากจะเอา NODE ไปต่อยอดจริงๆ พี่แอ๊ดมินขอเฟสบูีค หน่อยได้ไหมครับ ผมอยากจะปรึกษาเรื่องการส่งข้อมูลผ่านเน็ตครับ
// Read the first line of the request
ตอบลบString req = client.readStringUntil('\r');
Serial.println(req);
client.flush();
// Match the request
int val;
if (req.indexOf("/gpio/0") != -1)
val = 0;
else if (req.indexOf("/gpio/1") != -1)
val = 1;
else {
Serial.println("invalid request");
client.stop();
return;
}
// Set GPIO2 according to the request
digitalWrite(5, val);
client.flush();
// Prepare the response // ช่วยอธิบายโค้ดตรงนี้หน่อยได้ไหมครับ
String s = "HTTP/1.1 200 OK\r\nContent-Type: text/html\r\n\r\n\r\n\r\nGPIO is now ";
s += (val)?"high":"low";
s += "
\n";
// Send the response to the client
client.print(s);
delay(1);
Serial.println("Client disonnected");
// The client will actually be disconnected
// when the function returns and 'client' object is detroyed
}
รบกวนขอเฟสพี่แอ๊ดมินหน่อยได้ไหมครับผมอยากปรึกษาเรื่องโค้ดครับผม แล้วก็การส่งข้อความผ่านอินเตอร์เน็ต
ถ้าในความคิดผมจากการเดา
ลบ// Read the first line of the request
String req = client.readStringUntil('\r'); // คำขอจะต้องเท่ากับ client ไอ่ /r นี่คืออะไรครับ T_T
Serial.println(req); //แสดงคำขอ
client.flush(); // รอส่งข้อมูลออกไปทั้งหมด
// Match the request
int val; //ประกาศตัวแปร val
if (req.indexOf("/gpio/0") != -1) //ถ้คำำขอของ GPIO0 = -1
val = 0; //val=0
else if (req.indexOf("/gpio/1") != -1) //ถ้คำำขอของ GPIO1 = -1
val = 1; // val=1
else { //ถ้าไม่ใช่ทั้งหมด
Serial.println("invalid request"); //เขียน invalid request
client.stop();//หยุดไคลเอนท์
return; //ย้อนกลับไป
}
// Set GPIO2 according to the request
digitalWrite(5, val); // กำหนดขา 5 = val
client.flush(); //รอข้อมูลเอาต์พุตส่งออก
// Prepare the response // หลังจากนี้ไม่รู้เลยครับ
String s = "HTTP/1.1 200 OK\r\nContent-Type: text/html\r\n\r\n\r\n\r\nGPIO is now ";
s += (val)?"high":"low";
s += "
\n";
// Send the response to the client
client.print(s);
delay(1);
Serial.println("Client disonnected");
// The client will actually be disconnected
// when the function returns and 'client' object is detroyed
}
// แอ๊ดมินครับฟังชั่น ที่แอ๊ดมินเขียนนี่ หาข้อมูลได้จากที่ไหน หนังสือเล่มอะไรเหรอครับ ผมต้องการศึกษาข้อมูลมาก ขอขอบคุณที่สละเวลาครับ
\r = CR (Carriage Return) // Used as a new line character in Mac OS before X. \n = LF (Line Feed) // Used as a new line character in Unix/Mac OS X. \r\n = CR + LF // Used as a new line character in Windows
ลบการหาข้อมูล ดูจาก Google ครับ หรือ http://www.esp8266.com/arduino และ ตังอย่างใน ArduinoIDE สิ่งที่ต้องรู้เพิ่มเติมคือ การเขียน Web Application ด้วยวิธีการต่าง ๆ ครับ เพราะต้องนำมาประยุกต์ใช้ครับ
ลบความหมายแบบง่าย ๆ คือ ทาง browser จะต้องรู้ความหมาย ตัวอักษรหรือ String ที่ส่งไป
ตอบลบทาง web server หากมีการร้องขอมา server หรือ esp8266 จะต้องส่ง string ชุดนี้ออกไปครับ String s = "HTTP/1.1 200 OK\r\nContent-Type: text/html และตามด้วย (val)?"high":"low"; และ การส่งข้อมูลจะถูกส่งด้วย client.print(s); ครับ
ต้องหาอ่าน การรับส่งข้อมูลแบบ http ก่อนครับ
http://www.w3schools.com/tags/ref_httpmethods.asp
ผมไม่ได้มีความรู้มากเท่าไรนะครับ อันใหนรู้ ยินดีตอบครับ รบกวนถามทาง Blog ครับคนอื่นก็จะตามกันง่ายครับ facebook ไม่เหมาะกับการเก็บและสืบค้นครับ ต้องขอโทษด้วยครับ หากสนใจจะลองจัดเวลาวันหยุดทำ Workshop free ๆ น่าจะเหมาะกว่าครับ รบกวนถามว่า มีพื้นความรู้อะไรบ้างครับ จะได้อธิบายได้ง่ายขึ้น หาก จะ follow face book ก็ http://www.facebook.com/panmaneeminicnc ครับ มีอะไรใหม่ ๆ เราก็จะ post ทิ้งไว้ครับ หรือ Gplus+ https://plus.google.com/u/0/109497539927615976362 จะสะดวกกว่าครับ
ขอบคุณพี่แอ๊ดมินมากครับ
ลบลองอ่านเพิ่มเติม ตาม link นีครับ จะได้แนวคิดในการทำ web application ด้วย arduino มากกว่าที่คิดครับ ตามไปเลยครับ
ลบhttps://startingelectronics.org/tutorials/arduino/ethernet-shield-web-server-tutorial/
Android1:83: error: missing terminating " character
ตอบลบs += "
^
Android1:84: error: stray '\' in program
\n";
^
Android1:84: error: missing terminating " character
C:\Users\beer\Documents\Arduino\Android1\Android1.ino: In function 'void loop()':
Android1:84: error: 'n' was not declared in this scope
\n";
^
Android1:86: error: expected ';' before 'client'
client.print(s);
^
exit status 1
missing terminating " character
มีใครติดerror เหมือนผมบ้าง
ถ้าผมส่งข้อมูลเเบบ Udp ต้องเขียนยังไงคับ
ตอบลบ
ลบ#include
#include
#include
#define servo 5
Servo myservo;
WiFiUDP Udp;
const char* ssid = "OPPO R829";
const char* password = "1234567899";
IPAddress local_ip = {192,168,1,200};
IPAddress gateway = {192,168,1,1};
IPAddress subnet = {255,255,255,0};
//int servoPin = 5;
int ledPin = 16;
int pos = 180;
void setup() {
// put your setup code here, to run once:
Serial.begin(115200);
delay(10);
myservo.attach(5);
pinMode(servo,OUTPUT);
myservo.write(pos);
digitalWrite(servo,LOW);
//pinMode(relayPin, OUTPUT);
pinMode(ledPin, OUTPUT);
//digitalWrite(relayPin, LOW);
digitalWrite(ledPin, HIGH);
// Connect to WiFi network
Serial.println();
Serial.println();
Serial.print("Connecting to ");
Serial.println(ssid);
WiFi.mode(WIFI_STA);
WiFi.begin(ssid, password);
//if not need fix ip please comment
//WiFi.config(local_ip, gateway, subnet);
while (WiFi.status() != WL_CONNECTED) {
delay(500);
Serial.print(".");
}
Serial.println("");
Serial.println("WiFi connected");
// Start the server
Udp.begin(49999);
Serial.println("UDP Server started");
// Print the IP address
Serial.println(WiFi.localIP());
}
void loop() {
// Check if a client has connected
Udp.parsePacket();
while(Udp.available()){
Serial.print(Udp.remoteIP());
Serial.print(" : ");
String data = Udp.readStringUntil('\r');
//char req = Udp.read();
Serial.println(data);
if (data == "on"){
//if (req.indexOf("on") != -1) {
for(; pos > 1; pos -= 1)
{
myservo.write(pos);
delay(15);
digitalWrite(ledPin, LOW);
}
}
if (data == "off"){
//if (req.indexOf("off") != -1) {
for(; pos < 180; pos += 1)
{
myservo.write(pos);
delay(15);
//digitalWrite(servoPin, LOW);
digitalWrite(ledPin, HIGH);
}
}
Udp.flush();
delay(5);
}
}
ผมต้องเขียน inventor ยังไงหรอคับ
ลบใน app inventor เน้นการใช้ http ครับ ตอนนี้ก็พยายามหาทาง ส่งแบบ udp และ tcp อยู่ครับ หากคืบหน้าจะมาเล่าให้ฟังครับ ต้องใช้ appinventor extender
ลบขอสอบถามหน่อยนะครับ คือ
ตอบลบIPAddress gateway = {192,168,1,1} คือ IP ตัวบอร์ด WIFI เราหรือป่าวครับถ้าใช่จะต้องดูยังงัยครับ
ไม่ใช่ครับ มันคือ Gate way ครับ หากใช้ในวงแลนก็ไม่จำเป็นครับ
ตอบลบในแอปแอนดอร์ยขึ้น error Unable to [ost or put the text "" wit the specified URL: htpp://192.168.4.1/gpio/1
ตอบลบคืออะไรหรอครับ
ไว้ได้ไม่ได้ยังไงจะมาอัปเดทนะคะ
ตอบลบ
ตอบลบerror แบบนี้ต้องแก้ยังไงคับ
sketch_mar21b:94: error: missing terminating " character
s += "
^
sketch_mar21b:95: error: stray '\' in program
\n";
^
sketch_mar21b:95: error: missing terminating " character
C:\Users\PC'New\Desktop\sketch_mar21b\sketch_mar21b.ino: In function 'void loop()':
sketch_mar21b:95: error: 'n' was not declared in this scope
\n";
^
sketch_mar21b:97: error: expected ';' before 'client'
client.print(s);
^
exit status 1
missing terminating " character
IP address ของ Node MCU ต้องทำยังไงค่ะ รบกวนผู้รู้บอกหน่อยค้ะ
ตอบลบผมอยากได้โค้ดตรงที่เชื่อมต่อต้องก้อปเเค่ตรงไหนหรอกครับ
ตอบลบ